There was a moment—bright midday, my makeshift small studio filled with the deafening hum of my webcam. I hit record, and my face was crystal clear, but the background? A blurry mess. As I watched the playback, I realized something crucial: my setup wasn’t capturing the full scene, and it was holding back my content. That lightbulb moment made me question everything I knew about streaming gear.
Breaking Free from the Webcams: The Real Game-Changer for Creators
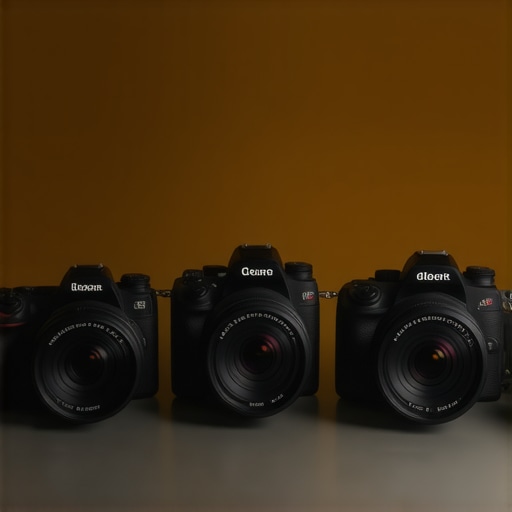
If you’ve ever felt limited by your current camera setup—struggling with blurry backgrounds, narrow angles, or poor quality—it might be time to rethink your approach. I’ve been there, and I can tell you that upgrading to a dedicated wide-angle 4K streaming camera opens up a new world of possibilities. Today, small studios like ours are shifting toward 3 wide-angle 4K cameras that provide a broader field of view, improved image clarity, and a professional feel—without breaking the bank.
But why now? Streaming and content creation have skyrocketed in popularity. According to recent data, live streaming is expected to reach over 1.7 billion viewers globally by 2024, emphasizing the need for quality visuals to stand out (source: Cameras for Creators). If you’re still relying on a basic webcam or even a mirrorless camera with a narrow shot, you’re missing the chance to make your streams more engaging and professional.
Wondering if this tech upgrade is really worth it?
You’re not alone. I made the same mistake early on—thinking a fancy camera wouldn’t make much difference. But after a few tests, I saw the stark contrast in footage quality and viewer engagement. Upgrading has been one of the best decisions I’ve made for my content. If you’ve faced the frustration of grainy images or limited angles, keep reading. I’ll walk you through practical steps to transform your setup with the right choice of cameras and gear, so your audience stays captivated and your videos look polished. Ready to ditch the Zoom setup and step up your game? Let’s get started on finding that perfect camera setup for your small studio.
Selecting the Right Camera for Your Content
Start by defining your core needs. Are you aiming for cinematic quality or reliable live streams? For YouTube creators, a 4K mirrorless camera offers a balance of quality and versatility. I vividly recall testing a variety of models, including some high-end options, and realizing that many affordable mirrorless options deliver professional results. Think of a mirrorless camera as your digital eye—smaller, faster, and more adaptable than traditional DSLRs, but with comparable image quality.
Establishing Your Shooting Angles and Setup
Arrange at least two cameras—one capturing your face and another for wider shots. For a small studio, wide-angle models like the top 4K wide-angle options make your space look more immersive. Use a sturdy tripod or mount that allows seamless switching between shots. When I first set this up, I used a makeshift tripod and struggled with shaky footage; upgrading to a fluid head tripod transformed my production quality almost instantly.
Choosing the Best Lenses for Your Camera
For crisp, professional videos, invest in prime lenses with wide apertures (f/1.8 or f/2.8). They provide a shallow depth of field, making you stand out from the background. I remember experimenting with kit lenses, but switching to a dedicated prime lens gave my videos a cinematic feel, especially in low-light conditions. Think of lenses as the eyes’ lenses—different glass for different effects and clarity.
Connecting Your Camera to Your Streaming Setup
To get your camera feed into streaming software, you’ll need a capture card—preferably one supporting 4K at 60 fps like the latest 4K capture cards. Hot tip: use USB-C connections where possible to minimize lag. In my first attempt, I used an outdated HDMI capture card and faced constant lag; upgrading to a newer model smoothed out my streams, making them look professional and polished.
Optimizing Your Lighting and Background
Lighting can make or break your video quality. Use softboxes or ring lights to evenly illuminate your face, avoiding harsh shadows. For backgrounds, simple and uncluttered setups work best, but a well-placed bookshelf or decorative item creates a dynamic scene. I experimented with various lighting configurations, and a key upgrade was adding a second fill light, which softened my shadows and improved overall clarity.
Testing and Fine-Tuning Your Camera Settings
Set your camera to record in 4K at 60 fps for fluid motion. Adjust ISO, shutter speed, and aperture to suit your environment. My first tests resulted in grainy footage; I learned that increasing ISO was counterproductive in low light, so I optimized my settings and used manual focus for sharper images. Remember, consistent testing is key—review footage regularly and tweak settings as needed.
Mastering Multi-Camera Synchronization
Switching angles seamlessly enhances viewer engagement. Use a video switcher or streaming software with multi-camera support, like OBS. When I added a second camera and coordinated the shot changes, my streams felt much more dynamic. Practice switching smoothly and coordinate with your scene transitions to maintain viewer interest.
Every step is a balance between quality and practicality. Think of upgrading your streaming gear as upgrading from a bicycle to a motorcycle—more power and speed but with added complexity. Take it step-by-step, test thoroughly, and continually refine your setup. For detailed camera recommendations and expert insights, explore resources like how to choose the best 4K camera for YouTube streaming.
 Many creators assume that simply switching to a 4K camera or a high-end mirrorless setup guarantees professional-quality videos. However, this oversimplification can lead to costly mistakes and missed opportunities. For instance, the common belief that higher resolution alone will elevate your content ignores critical nuances like codec compression, bandwidth limitations, and sensor performance in various lighting conditions. Overspending on an expensive camera without optimizing your streaming settings or understanding the camera’s dynamic range often results in disappointing footage. Additionally, a frequent myth is that all 4K cameras deliver identical quality; in reality, sensor size, color science, and autofocus capabilities significantly influence output. An advanced detail often underrated is the impact of in-camera processing—some models apply aggressive sharpening or noise reduction, which can muddy the picture. A practical mistake content creators make is ignoring the importance of proper color calibration and LUTs to match the camera’s look in post-production. Moreover, many overlook that streaming at 4K demands robust internet infrastructure; without a reliable connection, attempting to stream in 4K can cause lag, buffering, or dropped frames, undermining viewer experience. Mastering these subtleties transforms your setup from basic to professional, helping you avoid expensive pitfalls. For specialized advice, check out our comprehensive guide on [mastering content with mirrorless and 4K cameras today](https://cameras.creatorsetupguide.com/mastering-content-with-mirrorless-and-4k-cameras-today). Do you know the real differences between budget and premium cameras? Or how your Internet affects 4K streaming quality? I’d love to hear your experiences—drop your thoughts in the comments!
Investing in Reliable Tools and Software
Maintaining your streaming setup goes beyond just choosing the right camera; it requires regular upkeep of your tools and software. Personally, I rely on OBS Studio for its stability and versatility in managing multiple camera feeds, overlays, and transitions. Keeping OBS updated ensures you benefit from the latest features and security patches, reducing unexpected crashes during live sessions. For audio, I prefer Reaper for editing and managing sound levels, which I update regularly to maintain its performance and compatibility with new hardware. Additionally, scheduling routine backups of your configurations—such as save states and scene setups—can save you hours of frustration if something malfunctions, especially after system updates or hardware changes.
How do I maintain my streaming tools over time?
Adopt a maintenance routine that includes checking for software updates at least once a month and routinely testing your hardware connections. For instance, a loose HDMI cable or outdated capture card driver can cause lag or signal drops. I run diagnostics every few weeks, ensuring firmware for my cameras and capture devices like the reliable 4K streaming cameras is current to prevent overheating issues during prolonged sessions. Clear cable management and dusting your equipment prevent overheating and extend lifespan—it’s surprising how much a simple cleaning routine can improve performance.
Long-Term Results from Consistent Maintenance
The payoff from disciplined upkeep is significant: fewer technical hiccups, better video quality, and increased viewer engagement. Over time, you’ll notice smoother streams, less downtime, and the confidence to handle unexpected issues swiftly. Plus, consistent maintenance keeps your gear running efficiently, reducing replacement costs and helping you allocate resources toward upgrading your setup strategically. For very ambitious creators, investing in lightweight mirrorless cameras with good maintenance practices ensures longevity and excellent performance at a reasonable cost.
Scaling Your Equipment Without Hassle
As your audience grows, so does your gear, making scalability crucial. Avoid overextending by gradually adding components—start with a solid foundation like high-quality streaming cameras, then incorporate additional microphones, lighting, or secondary angles once your initial setup is rock solid. Regularly review the condition of your equipment—if a camera shows signs of wear or becomes outdated, replacing or upgrading components minimizes disruptions. Embrace modular setups, such as using swappable lenses or external audio mixers, to adapt quickly without investing in entirely new gear. This approach ensures your workflow remains smooth, and your content keeps looking professional, even as you scale.
Quick Tip: Try Using a Hardware Monitoring Tool
Advanced creators should consider tools like hardware monitors or system health apps to oversee temperatures, CPU load, and network stability during live streams. Regular monitoring alerts you to issues before they affect the quality of your broadcast. For example, I set up notifications for CPU overheating, which helped me avoid unexpected shutdowns during crucial streams. Make a habit of reviewing these logs after each session—it’s a small step that can prevent costly repairs or data loss and keeps your content flowing seamlessly.
Over the course of my journey, one lesson stands out vividly: investing in top-tier streaming gear isn’t just about flashy tech—it’s about transforming your entire creative experience. Those early frustrations with shaky footage or limited angles taught me to prioritize setup stability, sensor quality, and future scalability. Every creator faces unique challenges, but understanding that equipment is just one piece of the puzzle helps you focus on crafting compelling content, rather than troubleshooting technical glitches.
What I Didn’t Expect to Learn About 4K Cameras
- Many creators underestimate the power of proper lighting combined with a capable camera. Even the best 4K mirrorless model falls short without the right illumination—invest in good lights, and your footage instantly upgrades.
- In-camera settings matter more than I thought. Fine-tuning color profiles, sharpness, and focus modes can make a mundane shot look cinematic; neglecting these tweaks is a missed opportunity.
- The importance of a robust internet infrastructure can’t be overstated. A premium 4K streaming camera paired with low bandwidth just results in frustration. Running speed tests and optimizing network setups are part of the process.
- Scalability comes from thoughtful gear choices and workflow organization. Starting with a reliable, versatile camera and gradually adding accessories prevents overwhelm and keeps quality high as you grow.
- Great content relies on consistent testing and adjustments. Making time for regular reviews of your footage helps catch issues early—don’t wait for a critical stream to identify problems.
My Recommended Gems for Content Creators
- Streaming Camera Spotlight: This guide helped me identify the best 4K cameras that balance quality, price, and ease of use, specifically tailored for content creators aiming for professional results.
- Mirrorless Mastery: Understanding how mirrorless cameras outperform traditional DSLRs in streaming scenarios was a game-changer, offering lightweight design with stunning footage.
- Ultimate Guide for YouTube Shorts: This resource provided invaluable tips on framing, lens choices, and settings optimized for vertical content—a must-read for Shorts creators.
Believe in Your Creative Power Today
The path to producing engaging, high-quality content starts with recognizing the potential of your gear and your vision. Whether you’re upgrading your camera or fine-tuning your setup, remember that each step brings you closer to your audience and your goals. Don’t wait for the perfect moment; take the leap now—your audience is eager to see what you create with the right tools. Keep experimenting, stay curious, and let your passion shine through every frame. If you’ve faced challenges with camera settings or streaming stability, share your experiences below—let’s learn and grow together!