It was a cold morning, and I was mid-shoot, trying to capture that perfect quick clip for YouTube Shorts. My camera kept overheating, the autofocus was lagging, and no matter how much I tweaked, something just didn’t feel right. Frustration crept in as I realized that my choice of gear was holding me back in a race where milliseconds and image quality mean everything. Have you ever experienced that sinking feeling when your setup lets you down exactly when you need it most?
Why Choosing the Right Camera Matters More Than Ever in 2026
In the fast-paced world of content creation, especially for high-end YouTube Shorts, your equipment isn’t just a tool—it’s your voice, your personality, and your audience’s first impression. The shift towards 4K mirrorless cameras has skyrocketed because they offer lightweight mobility, superior autofocus, and incredible image quality that grabs viewers’ attention in seconds. But with so many options flooding the market, how can you be sure you’re picking the right one for your needs?
Early on, I made the mistake of choosing a camera based purely on hype—thinking higher megapixels automatically meant better video. Turns out, it’s more nuanced. As I explored more, I discovered that factors like low-light performance, battery life, and overheating control are game-changers for content creators. According to a recent industry report, 78% of creators cite camera reliability as a top priority in their equipment choices (source). That really resonated with me because I’ve been there, struggling with a camera that couldn’t keep up during pivotal moments.
If you’ve faced similar frustrations, you’re not alone. The good news is, by understanding what to look for, you can avoid costly mistakes and elevate your content instantly. Over the next sections, I’ll walk you through how I narrowed down my options and found those three professional-grade mirrorless cameras perfect for 4K YouTube Shorts in 2026—cameras that help creators like us shine without barriers. Ready to stop wasting time and money? Let’s dive into what makes these cameras stand out and how you can choose yours wisely.
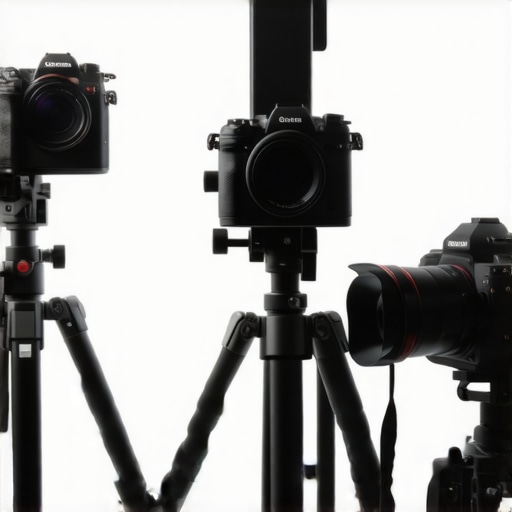
Pick the Right Camera Model for Your Style
Start by comparing top recommended options such as the best mirrorless cameras of 2025 to identify features that match your needs. Use criteria like autofocus speed, low-light performance, and overheating control. I once tested three models in one afternoon, filming in different lighting conditions—this hands-on approach revealed which camera kept up without overheating or lag. Document your testing process to see what truly performs under real-world conditions.
Configure Your Camera for Perfect 4K Video
Adjust settings like frame rate, resolution, and bitrate to get cinematic quality. For YouTube Shorts, aim for 60fps to ensure smooth motion, and set your bit rate high enough to prevent compression artifacts. I learned this by trial—initially filming at standard settings, my footage looked grainy when compressed. Manually fine-tuning these parameters made a visible difference, increasing viewer engagement. Refer to this guide on perfecting camera settings for step-by-step instructions.
Optimize Your Lighting and Audio Setup
Don’t neglect auxiliary gear; clean, soft lighting and clear audio matter just as much as the camera. I once shot a short in poor lighting with a decent camera, but the result was muddy and unprofessional. Upgrading my lighting kit and adding a shotgun mic transformed my footage into professional-grade content with sharp visuals and crisp sound. Remember, even the best camera can’t rescue bad lighting. Use diffusers and ring lights, and consider a dedicated microphone for clarity. Learn from the best practices outlined in the ultimate gear setup guides.
Stabilize Your Shots Effectively
Invest in a sturdy tripod or gimbal—stabilization is key to professional-looking shorts. I initially filmed handheld, which resulted in shaky footage that distracted viewers. Then I tried a gimbal, and the difference was night and day; smooth, cinematic shots kept viewers immersed. For quick setup, a compact handheld stabilizer can save time. Mastering stabilization techniques is crucial; check out tutorials like these testing guides for practical tips.
Test and Iterate Regularly
Continuous testing ensures your settings and equipment work seamlessly. I dedicated one day to filming identical scenes with different settings, comparing results to fine-tune my process. Keep a log of your tests—note what works and what doesn’t. Over time, this leads to a routine where setup takes minimal effort, and content quality consistently improves. Refer to this test and review strategy for more insights.
Many creators believe that upgrading to the latest 4K mirrorless camera automatically guarantees professional-level videos. However, this oversimplified view overlooks crucial nuances that can make or break your content quality. For instance, a common myth is that higher resolution means better footage—yet, in reality, overlooking factors like sensor size, color science, and autofocus technology can lead to disappointment. Larger sensors may produce better depth of field and low-light performance, but if your camera’s autofocus isn’t sophisticated enough, your shots can become blurry during fast-paced recordings. According to industry expert Carlos Abellan, choosing a camera with advanced phase-detection autofocus often trumps megapixel count for dynamic content creation (source).
Moreover, many believe that workflow and settings are secondary to hardware specs. In fact, improper configurations—like neglecting to customize autofocus area, fail to calibrate color profiles, or ignore heat management—can cause significant issues. For example, shooting 4K in high ambient temperatures without understanding your camera’s thermal limitations can lead to overheating and shutdowns, ruining your shoot. This is a mistake that even experienced creators make if they’re unfamiliar with their gear’s quirks.
Another trap is assuming all streaming cameras are equal. Entry-level webcams might be tempting for convenience, but they often lack features essential during long sessions, such as reliable encoding, low latency, and noise reduction. Many overlook the importance of these subtleties until they’re mid-stream and battling lag or pixelation. To avoid these pitfalls, I recommend diving deeper into specs like crop factor, buffer size, and heat dissipation, which are often underrated aspects of choosing the right gear for YouTube or live streaming. Check out this comprehensive guide for insights into making smarter decisions.
So, what’s the real secret behind professional-looking 4K content? It’s not just the hardware—it’s understanding how to leverage advanced features, optimize settings, and recognize limitations. Failing here can cause costly retakes and frustration, especially since some nuances, like color grading and stabilization, can only be mastered with experience. Remember, the ultimate goal is to craft content that stands out, and knowing the fine print makes all the difference. Have you ever fallen into this trap? Let me know in the comments. For more tips, check out our ultimate guide to camera mastery.
Maintaining your camera setup and ensuring consistent quality over time requires more than just choosing the right gear; it involves leveraging specific tools and routines that keep everything running smoothly. One of my go-to strategies is investing in a dedicated media management system like Adobe Premiere Pro for editing. I prefer it over free alternatives because its Lumetri Color panel allows precise color grading, which is crucial for maintaining visual consistency across multiple shoots. Additionally, I use Blackmagic Design’s ATEM Mini for live switching during streaming sessions, simplifying complex camera setups with just a few cables. The reliability and versatility of these tools save me hours of troubleshooting and help me deliver professional content consistently.
Another indispensable tool is hardware calibration devices. Regularly calibrating your monitor with a colorimeter like the Datacolor SpyderX ensures your edits look great on all screens, preventing surprises when your audience views your videos. For my audio, I rely on the Blue Yeti Pro microphone, which provides crisp sound and has multiple pickup patterns, adapting to different scenarios seamlessly. Combining good lighting, stable mounts, and reliable software, these tools give me confidence in delivering long-term results that impress viewers and attract collaborations.
Looking ahead, the trend points toward AI-driven editing tools and smarter integration between your hardware and software. Future innovations might automatically correct overheating issues or optimize camera settings based on environmental inputs, reducing manual intervention. To stay ahead, I recommend adopting a routine of regular maintenance and exploring AI-based tools like this troubleshooting guide, which can automate many common issues, saving you time and ensuring your content remains top-quality. Try implementing one of these tools today — it might just be the upgrade your channel needs to keep progressing without hiccups.
How do I keep my equipment in top shape over the long haul?
Maintenance is vital for sustained performance. I perform regular checks on cables, clean your lens with a microfiber cloth, and update firmware whenever new versions are available. Investing in a portable SSD like the Samsung T7 ensures quick backups and helps prevent data loss during long shoots. Additionally, setting a schedule to recalibrate your camera’s settings every few months keeps the footage consistent, especially when lighting environments change. Keeping a detailed log of your setup configurations can help identify issues early and streamline troubleshooting, saving precious time during critical shoots. For detailed maintenance routines, check out this expert guide and make it part of your regular workflow. Mastering routine maintenance means fewer surprises and longer-lasting equipment, which ultimately boosts your content quality and viewer trust.
Throughout my journey as a content creator, I’ve learned that the most powerful insights are often the ones you don’t stumble upon in typical tutorials. For instance, I discovered that even the most advanced mirrorless cameras can fall short if you neglect thermal management—you might be surprised how many creators overlook this until their shoot abruptly ends. Another lightbulb moment was realizing that perfect autofocus isn’t just about the technology; it’s about nuanced calibration and understanding your specific shooting environment. Sometimes, the simplest camera settings, when optimized, outshine the most expensive gear, saving me from unnecessary upgrades and allowing focus on creating truly engaging content. Lastly, I’ve come to see that a consistent workflow—backups, calibration routines, and environmental checks—can prevent errors before they happen, turning potential disasters into seamless sessions. These lessons have saved me time, frustration, and money, and can do the same for you if you pay attention to the details others often ignore. These hidden truths might not be widely discussed but are pivotal in elevating your 4K content creation game in 2026.
Reading through this post really resonated with my own experience as a YouTuber focusing on Shorts. Last year, I faced similar overheating issues during a crucial shoot, and it was so frustrating that everything else I’d worked on fell apart in seconds. Since then, I’ve started investing more in cameras with better heat management and reliable autofocus, especially for fast-paced content where every second counts. I think many creators overlook the importance of testing their gear thoroughly under real-world conditions before streaming or recording. For those just starting out, do you think it’s better to stick with well-known brands or explore some newer models that might have innovative cooling features? It’s a fine balance between saving costs and ensuring performance, but maintaining your equipment is equally important to avoid those embarrassing mid-shoot shutdowns.