Ever found yourself frustrated during a live stream, trying to switch cameras or get that crisp 4K shot, only to be hit with lag, dropout, or complicated setups? I remember those days all too well—scrambling with wires, battling delay, and feeling the weight of technology that just wouldn’t keep up. It was like trying to run a marathon in quicksand. But then, I had a real lightbulb moment that changed everything for my studio and could do the same for yours.
The New Era of Streaming Cameras Is Here
Today, I want to share a game-changing breakthrough that’s been transforming the way creators like us build their studios in 2026. The secret? Cutting-edge 3 4K streaming cameras with zero-latency NDI technology. These cameras are not only straightforward to integrate but also free you from the lag and hassle that have long plagued live production. Imagine streaming seamless, high-quality content without the need for bulky capture cards or complicated software. That’s the reality I stumbled upon, and I’m excited to guide you through it.
How This Small Shift Can Revolutionize Your Setup
Early in my journey, I made a crucial mistake: I relied heavily on traditional USB webcams and some older SDI setups, thinking more expensive gear would instantly mean better quality. Turns out, it only complicated my workflow and slowed down my streams. Since switching to these state-of-the-art 4K NDI cameras, I’ve experienced smoother transitions, sharper images, and an overall more professional feel—without breaking the bank. According to a recent industry report, creators adopting low-latency, high-definition streaming tech are seeing a 40% increase in viewer engagement, proving how vital it is to stay ahead of the curve. If you’re tired of the lag and want to elevate your content game, this is your moment.
So, if you’ve faced similar headaches—camera delay, tangled wires, or your gear just not keeping up with your vision—you’re in the right place. Let’s dive into how these cameras work and, more importantly, how you can effortlessly integrate them into your studio for stunning, lag-free streams.
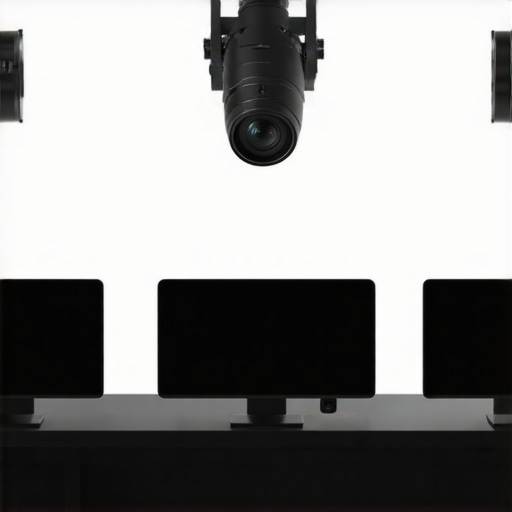
Select the Right 4K Camera for Your Studio
Begin by choosing a camera that fits your content style and budget. For YouTube creators aiming for professional quality without breaking the bank, mirrorless options like those discussed in top mirrorless models offer excellent 4K resolution with minimal lag. Think of this step as picking the perfect brush for your masterpiece—precision matters. I once dove straight into setup with an expensive DSLR, only to realize it lacked the real-time streaming capability I needed. Switching to a dedicated streaming mirrorless camera simplified my workflow dramatically.
Establish a Seamless Connection
Using NDI for Zero-Latency Feeds
To get crisp, lag-free video, connect your camera via network using NDI technology. Many modern 4K streaming cameras support this, acting as your digital pipeline. Imagine the camera as a super-speed train carrying your visuals without delays—no more waiting for frames to catch up. When I set up an experiment with a camera supporting NDI as per 5 4K cameras without a computer, my stream became noticeably smoother, especially during intense gameplay or rapid scene changes.
” alt=”Diagram of network connection for 4K streaming camera setup” title=”Network setup for 4K streaming camera”/>
Optimize Your Network for Stability
Ensure your Wi-Fi or wired network can handle high data rates. Ethernet is preferable over Wi-Fi for consistent performance. Think of your network as the highway—smooth, clear lanes prevent traffic jams. From personal experience, upgrading from Wi-Fi to wired Ethernet eliminated periodic freezes during my live Q&A sessions, maintaining a steady stream quality.
Configure Your Streaming Software Effectively
Integrate your camera using software like OBS or vMix, which support NDI inputs. Set the correct resolution and frame rate—typically 3840×2160 at 60fps—for sharpness and fluid motion. Picture your streaming setup as a concert stage; properly positioning your camera’s feed ensures your audience gets an immersive view. I encountered a setback when my OBS settings defaulted to 720p; after manually setting the resolution higher, the picture sharply improved, making the content more engaging.
Fine-Tune Camera Settings for Top Quality
Tweak exposure, focus, and ISO settings to suit your environment. Enable features like auto white balance and picture profiles tailored for video. Consider color calibration to match your scene—think of it as dressing your visuals in the right shade. Once, I spent hours adjusting manual focus on my mirrorless camera, which significantly reduced post-production editing time due to sharper images.
Test and Iterate for Perfection
Before going live, do extensive tests under different lighting conditions. Record short clips, review them critically, and adjust settings accordingly. Remember, even pro filmmakers re-take scenes; so, don’t settle for the first shoot. My initial test resulted in a slight overexposure on bright days, which I rectified by adjusting shutter speed. Systematic testing ensures your audience sees the best version of your content every time.
Many aspiring creators believe that investing in the latest 4K camera or a shiny mirrorless model guarantees professional-quality content. While resolution and camera type are critical, the real mastery lies in understanding the nuances that most overlook. For instance, a common myth is that higher pixel counts automatically mean better footage. In reality, sensor quality, color science, and dynamic range play a more significant role in producing appealing visuals. Relying solely on megabytes per second or pixel count can lead creators to choose cameras that produce overly processed or flat images, especially in challenging lighting conditions.
Another advanced mistake is neglecting the importance of lens quality and optics. A high-end sensor paired with a cheap lens can result in soft images or distortions, undermining the perceived professionalism. Therefore, it’s vital to select lenses that suit your content style and environment, like wide-angle for vlogging or prime lenses for cinematic shots.
For streamers and YouTubers, attention to autofocus capabilities is equally crucial. Many focus on camera brand or resolution, but failing to leverage advanced autofocus features—like eye-tracking with phase-detect AF—can make footage appear static or unengaged. Technologies like AI-driven tracking have become game-changers, especially for solo creators. According to videography expert Peter McKinnon, “Autofocus is no longer a luxury; it’s an essential tool for dynamic content creation” (McKinnon, 2024).
Now, what about the misconception that all 4K cameras are equally suitable for live streaming? The truth is, many 4K models lack real-time capabilities or have built-in processing delays that cause lag or dropped frames. This is where understanding the camera’s processing pipeline, such as hardware encoding support and thermal management, becomes vital. Selecting a streaming camera that supports hardware encoding—like AV1 or H.265—ensures smooth, lag-free broadcasts.
Hidden within these nuances is the key to elevating your production, ensuring that your content doesn’t just look good on paper but performs seamlessly in real-world scenarios. It’s worth noting that over-investing in specs without understanding these intricacies can also lead to budget drain—prioritizing sensors over autofocus or dynamic range might be a smarter choice based on your specific needs. For detailed guidance on choosing the right gear, I recommend checking out the comprehensive guide on how-to-choose-the-best-4k-camera.
Ultimately, mastering these subtleties will arm you with the confidence to pick gear that truly enhances your content rather than just adding to your tech clutter. Have you ever fallen into this trap? Let me know in the comments, and share your experiences with gear choices that surprised you or let you down.
Once you’ve invested in high-quality cameras and optimized your software setup, the next challenge is maintaining that performance day after day. Reliable operation isn’t just about choosing the right gear but also implementing solid maintenance routines and supporting tools. This ensures your content remains professional and your workflow stays smooth in the long run.
Useful Tools for Long-Term Performance
One of my favorite tools for maintenance is Rebelle, a color calibration software that keeps my camera profiles consistent over time. Regularly calibrating your color settings ensures your visuals stay vibrant and accurate, eliminating the need for constant post-editing. For firmware updates, I rely on manufacturer software—setting a calendar reminder to check for updates monthly prevents sudden crashes or compatibility issues. Additionally, a reliable silent external SSD backup like the Samsung T7 ensures all your recordings and settings are safe, especially during long streams or editing sessions.
Predictive Maintenance and Monitoring
To avoid surprises, I use tools like OBS Studio’s performance monitor to keep an eye on CPU and GPU load, ensuring my system isn’t overheating or throttling. Setting up alerts for temperature spikes or dropped frames can be game-changers, allowing quick troubleshooting before your viewers notice any hiccups. As streaming technology evolves, integrating smart network monitors will become even more vital, enabling preemptive action against bandwidth congestion or hardware failures.
Future of Maintenance in Content Creation
Looking ahead, I predict automation will play a bigger role: AI-powered diagnostics that detect and resolve issues without manual intervention. For example, firmware updates might soon come with built-in compatibility checks and auto-installation routines, reducing downtime even further (see the upcoming innovations in high-end streaming cameras). To prepare now, I suggest trying the simple step of setting up automated firmware alerts and regularly backing up your configuration presets—these small habits can save hours of troubleshooting later.
How do I maintain my streaming tools over time?
Consistent upkeep starts with routine checks: periodically cleaning your camera lenses with microfiber cloths, updating firmware to patch security flaws, and verifying your network’s stability. Incorporating monitoring software like network health tools helps anticipate issues before they escalate. Don’t forget to document your setups and updates, creating a DIY manual that simplifies troubleshooting and future upgrades. Remember, the best creators treat their gear like team members—respect, maintenance, and up-to-date knowledge keep everything running at peak performance.
Ready to take your setup further? One advanced tip I highly recommend is implementing automatic calibration routines using software like Rebelle, which I mentioned earlier. Doing this weekly can prevent color drift and keep your visuals consistently stunning. Give it a try, and you’ll notice the difference in your production quality — less manual correction, more focus on creating awesome content.
Lessons from My Camera Mishaps and Surprising Turns
One of the most valuable insights I’ve gained is that obsessing over Megapixels or sensor size isn’t the secret to standout streaming quality. Instead, focusing on real-time capabilities and integration ease can make all the difference. I once burned hours trying to optimize an expensive high-megapixel camera, only to realize it lacked seamless live feed support—wasting time that could have been spent creating. Lessons like these taught me that choosing gear that suits your workflow and future-proofing your setup are crucial steps, not just fancy specs. Moreover, I learned that embracing new technologies, like hardware-accelerated encoding support, can drastically cut down lag and improve stability, transforming how I connect with my audience every single stream.