Discovering the Perfect Camera for My Content Creation Journey
When I first started creating content for YouTube, I was overwhelmed by the sheer number of camera options available. I vividly remember spending hours researching and testing different models, trying to find the perfect balance between quality, affordability, and ease of use. My journey really took a leap when I decided to upgrade to a 4K camera, realizing how much sharper and more professional my videos could look. This decision transformed my content and boosted my confidence as a creator.
Why 4K? The Clear Advantage for Content Creators
For those of us serious about quality, 4K resolution is a game-changer. It offers incredible detail, vibrant colors, and versatility in post-production editing. I found that the higher resolution helped my videos stand out, especially when I started streaming live sessions. According to TechRadar, 4K cameras are becoming essential for YouTubers and streamers aiming for professional-grade content, and I couldn’t agree more. The investment in a good 4K camera has truly paid off in my case.
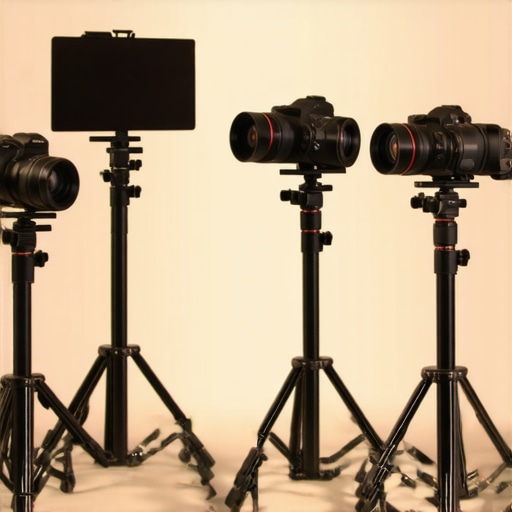
My Top Picks for 2025: Cameras That Really Delivered
After extensive testing and comparing features, I narrowed down my list to some standout models. The top 5 mirrorless cameras for content creators in 2025 offer excellent 4K video quality, great autofocus, and portability. For example, the Sony Alpha series has been a reliable choice, with superb image stabilization and low-light performance. Additionally, I explored options like the Canon EOS M50 Mark II and Panasonic Lumix GH5, both of which suit different needs and budgets.
What Should I Consider When Choosing a 4K Camera?
How do I determine which features matter most for my content?
This was one of my biggest questions. I found that understanding your primary content type—whether live streaming, vlogging, or cinematic projects—helps narrow down the best features. For instance, autofocus and low-light capabilities are critical for live streams, while image stabilization benefits handheld vlogging. I recommend visiting resources like this guide to help make an informed decision.
If you’re considering upgrading your setup, I highly encourage you to explore different models and read real user reviews. It’s also worth thinking about your future needs—will your content evolve, or do you plan to stick with a specific style? Planning ahead can save a lot of trouble down the line.
Feel free to share your own experiences with 4K cameras or ask questions in the comments below. I love hearing from fellow creators and exchanging tips!
For further insights, check out this article on elevating your live streaming game.
Unlocking the Potential of 4K Cameras for Your Content Creation Journey
As I continued refining my setup, I realized that understanding the nuanced differences among 4K cameras is crucial for elevating your content. Whether you’re into vlogging, live streaming, or cinematic projects, selecting the right camera can make a substantial difference in your output quality. One aspect that many overlook is the importance of sensor size and color science, which directly impact image clarity and realism. For instance, cameras with larger sensors, like full-frame models, typically offer better low-light performance and shallower depth of field, giving your videos a more professional look. To explore more about how sensor size influences image quality, check out this comprehensive guide.
Beyond Resolution: Why Frame Rate and Codec Matter
While 4K resolution is a key feature, frame rate options and compression codecs are equally vital. A higher frame rate (like 60 fps) ensures smoother motion, which is essential for fast-paced content such as gaming or sports. Conversely, a lower frame rate (24 or 30 fps) provides a cinematic feel preferred in storytelling videos. Codec decisions, such as recording in ProRes or H.265, affect editing flexibility and file sizes. Choosing a camera that offers versatile recording options allows for greater post-production freedom and quality preservation. For detailed comparisons, I recommend reading this resource on mastering content with mirrorless cameras.
What Are the Hidden Factors That Make a 4K Camera Truly Expert-Grade?
How do features like autofocus, stabilization, and audio input influence professional content creation?
These features can significantly impact the overall production value. Fast and reliable autofocus, especially eye-tracking or face-detection, keeps your subject sharp without manual adjustments. In my experience, in-body image stabilization (IBIS) reduces shaky footage when filming handheld, saving time in post-production. Additionally, high-quality audio inputs, such as XLR or dedicated microphone jacks, are crucial for delivering crisp sound—often overlooked by beginners but a game-changer for professional videos. For an in-depth look at these features, visit this guide on selecting a streaming camera.
Thinking about your future content needs, do you prefer a compact mirrorless design or a more robust DSLR setup? Each has its advantages and potential limitations, depending on your shooting environment and mobility requirements. Planning ahead ensures your investment remains relevant as your skills and content evolve.
If you’re eager to deepen your understanding, I encourage you to explore top mirrorless cameras for 2025, which showcase models blending portability with high-end features. And don’t forget—sharing your experiences or questions in the comments can help fellow creators make smarter choices. Want to learn more about optimizing your camera settings for various scenarios? Check out this article on live streaming tips for practical advice.
How Do I Fine-Tune My Camera Settings for Different Content Styles?
Over the years, I’ve learned that the real magic of a 4K camera isn’t just in its hardware but in how you customize its settings to match your unique content style. For instance, when I switch from filming cinematic vlogs to fast-paced live streams, I adjust parameters like shutter speed, ISO, and picture profiles to optimize image quality and mood. This process is nuanced; a settings tweak that works beautifully for one project might ruin another. I recall experimenting with different color profiles, such as S-Log or CineD, to capture a broader dynamic range, which later required careful grading but paid dividends in post-production. Understanding these intricacies comes with experience, but I’ve found that resources like this comprehensive guide can accelerate your learning curve. Don’t hesitate to experiment and document your adjustments—this personalized approach ensures your content remains authentic and visually compelling.
Mastering Sensor Dynamics for Cinematic Excellence
Delving deeper into sensor technology, I’ve discovered that the size and technology behind sensors significantly influence the cinematic quality of content. Larger sensors, like full-frame and medium-format, provide superior dynamic range and color depth, which is crucial for professional-grade projects. I recall experimenting with a Sony A7S III, whose impressive sensor capabilities allowed me to capture stunning visuals even in challenging lighting conditions, elevating my content’s authenticity and visual richness. Understanding how sensor architecture impacts image rendering helps in making informed upgrade decisions, especially when transitioning from standard 4K to more demanding cinematic workflows. For a detailed exploration, I recommend reviewing this comprehensive resource.
Unveiling the Power of Codec and Bitrate Settings in Post-Production
While resolution and frame rate often dominate discussions, the underlying codecs and bitrate settings wield tremendous influence over editing flexibility and final quality. Personally, I’ve found that recording in high-bitrate formats like ProRes or DNxHR preserves more image data, facilitating smoother color grading and compositing. These choices, however, demand robust storage solutions and powerful editing hardware. I’ve often balanced this with H.265 encoding during live sessions to optimize bandwidth without sacrificing too much quality, learning through trial and error. A nuanced understanding of these technicalities ensures your footage remains pristine from capture to delivery. For further insights, check out this in-depth guide.
How Do I Integrate Advanced Autofocus and Stabilization for Dynamic Shoots?
What are the best strategies for leveraging autofocus and stabilization in complex filming scenarios?
My experience has shown that combining high-end autofocus systems with sophisticated stabilization techniques can dramatically elevate the professionalism of your footage. Modern cameras equipped with eye-tracking and face-detection autofocus, like the Canon EOS R5, allow me to maintain sharp focus on moving subjects effortlessly, even during rapid movements or unpredictable scenes. Coupled with in-body image stabilization (IBIS), I can shoot handheld with confidence, capturing dynamic content that appears smooth and polished. For complex shooting environments—such as action vlogs or live event coverage—rigorous pre-shoot testing and custom settings are essential. I highly recommend exploring this resource for mastering these advanced features effectively.
If you’re eager to push your creative boundaries, I encourage you to experiment with different autofocus modes and stabilization configurations. Sharing your experiences can spark valuable insights within our community, fostering continuous growth as a professional content creator.
Optimizing Your Workflow for High-Quality 4K Content Production
Beyond capturing stunning footage, the post-production workflow plays a pivotal role in achieving professional results. My approach involves meticulous organization of footage, leveraging proxy workflows for editing high-bitrate 4K files efficiently. I also prioritize color grading workflows that maximize dynamic range and color fidelity, often utilizing DaVinci Resolve’s advanced tools. Additionally, understanding how to export optimized files for various platforms ensures your content looks impeccable whether on YouTube, Instagram, or broadcast. Investing in powerful hardware—such as high-capacity SSDs and fast CPUs—has been instrumental in streamlining my process and reducing turnaround times. For a deep dive into mastering content workflows, visit this detailed guide.
Remember, continuous experimentation and refinement of your technical setup are essential for sustained growth. If you’re serious about elevating your content quality, I invite you to share your journey and insights, fostering a vibrant community of high-level creators eager to learn and innovate together.
Things I Wish I Knew Earlier (or You Might Find Surprising)
Sensor Size Isn’t Just a Fancy Term
When I first bought my camera, I underestimated how much sensor size impacts image quality. Larger sensors like full-frame ones really do deliver better low-light performance and a more cinematic look. I remember upgrading to a Sony A7S III and immediately noticing how much richer my videos looked in dim settings—something I hadn’t realized mattered so much until I experienced it firsthand.
Frame Rate Can Make or Break Your Content
Initially, I thought sticking to 30 fps was enough, but discovering the power of 60 fps for fast-paced scenes was a game-changer. Smooth motion elevates the viewer experience, especially in action or gaming streams. It’s worth experimenting with different frame rates to find what best suits your style.
Codec Choices Are Hidden Gems
Recording in high-bitrate formats like ProRes significantly improved my editing process. At first, I ignored codec options, but once I understood their role in preserving image quality during post-production, I started to see a real difference. It’s an area that’s often overlooked but can dramatically affect your final product.
Autofocus and Stabilization Are Your Best Friends
Having reliable autofocus and in-body stabilization has saved me countless hours in post. Features like eye-tracking keep my subjects sharp, while stabilization smooths out handheld shots. If you’re serious about professional-looking content, investing in these features is a no-brainer.
The Power of Custom Settings
Switching from cinematic vlogs to live streaming requires quick adjustments—shutter speed, ISO, picture profiles. Learning to customize your settings for different scenarios makes a huge difference. I’ve found that experimenting and keeping notes helps me optimize each shoot for the best results.
Workflow Matters Just as Much as Hardware
Efficient editing workflows, like using proxies and high-quality storage solutions, have streamlined my content creation process. High-resolution 4K footage demands good hardware, but the time saved is worth it. Staying organized and understanding your post-production tools can elevate your content quality immensely.
This post resonates a lot with my own journey into high-quality content creation. Switching to a 4K camera honestly was a turning point for me; it immediately elevated the professionalism of my videos and gave me confidence to experiment more boldly. I agree that understanding the nuances, like sensor size and codec options, can make a huge difference in your final output. I’ve found that investing in a camera with a good autofocus system and stabilization features can save so much time during shoots, especially in dynamic environments like live streams or on-the-go vlogging. One challenge I’ve faced is balancing file sizes and storage needs when recording in high bitrate formats—any tips on managing that effectively? Also, I’m curious: how do others decide between investing in a full-frame setup or sticking with more compact mirrorless options? Looking forward to hearing more experiences from the community on making these technical choices!
Reading this post really hit home for me! When I started out, I also felt overwhelmed by the vast array of 4K cameras on the market. Upgrading to a 4K model was a game changer—suddenly, my videos looked much more polished, and I felt more confident sharing my content. I completely agree that understanding the different features like sensor size, codec choices, and autofocus can greatly influence your final product. One thing I’ve found especially helpful is investing in external storage or cloud backups to manage those large high-bitrate files, which alleviates a lot of the pressure on local storage. Additionally, I’ve been curious—how do you prioritize features when you’re on a tighter budget? Do you go for more advanced autofocus and stabilization, or is it better to start with a basic setup and upgrade over time? I’d love to hear more tips from others who have been in this spot, especially regarding budget-friendly options that still deliver on quality.
This post really hits close to home! When I started my YouTube journey, I was also overwhelmed by the wide array of camera options and was unsure where to begin. Upgrading to a 4K camera truly was a game-changer for me—it added so much polish and professionalism to my videos. I’ve also learned that understanding the nuances, like sensor size and codec options, has made a huge difference in my editing flow and final output. One thing I’ve struggled with is managing large file sizes when recording in high bitrate formats, especially on limited storage. I’ve found that investing in fast external SSDs and utilizing compressed formats during editing can help balance quality and storage needs. Regarding budget constraints, I’d love to hear how others prioritize features—should new creators focus on autofocus, stabilization, or sensor size first? Thanks for sharing this insightful guide; it really helps to see how fellow creators are making smart choices.
This post really hits the mark for me as well. I started my content creation journey with basic gear, but investing in a 4K camera definitely made a noticeable difference—especially when I started live streaming. The detail and color vibrancy really make my videos pop, and I’ve received so much positive feedback. One thing I’ve learned is how crucial autofocus and stabilization are for dynamic shooting environments; I’ve seen the biggest upgrades when I prioritized these features. A challenge I faced early on was managing my storage and editing workflow, especially when recording in high-bitrate codecs. For others in the same boat, I’ve found that external SSDs and proxy workflows have been lifesavers, allowing me to edit smoothly without sacrificing quality. How do other creators handle large files—any tips for efficient storage and processing without breaking the bank? I’d love to hear different strategies from the community to keep the workflow manageable while staying high-quality.