I’ll never forget the moment I realized my old camera just wasn’t cutting it anymore. I was live streaming, trying to connect with my audience, when suddenly, the video quality dropped, and everything looked pixelated and blurry. Frustration hit hard. That lightbulb moment made me understand that if I wanted to grow and stay competitive, I had to upgrade my gear. But here’s the catch — choosing the right 4K camera isn’t as simple as picking the newest model on the shelf.
Why Upgrading Your Camera Is a Game Changer in 2025
Today’s content landscape is more competitive than ever. With platforms like YouTube emphasizing high-quality visuals and live streaming becoming the norm, having a top-notch camera isn’t just a luxury — it’s a necessity. According to recent studies, videos with higher resolution and professional-looking visuals retain viewers longer and boost engagement. That’s why investing in the best 4K cameras for YouTube & streaming in 2025 can dramatically elevate your content and help you build a loyal audience.
And trust me, I’ve made my fair share of mistakes early on. I once bought a camera because it was popular without considering whether it suited my style or setup. That led to frustration, wasted money, and a lot of time trying to retrofit gear that just didn’t work for me. So, in this guide, I’ll share what I’ve learned — the tips, the pitfalls to avoid, and what features truly matter when picking your perfect camera.
Is 4K Really Worth the Hype?
You might be skeptical. I get it. With so many options, it’s tempting to think, “Do I really need 4K?” The answer is an emphatic yes — especially in 2025. Higher resolution means sharper details, better cropping options, and a more professional look that stands out in a crowded feed. Plus, 4K content ages better over time, ensuring your videos stay relevant longer. If you’re serious about creating content that shines, a 4K camera isn’t just a nice-to-have — it’s a must-have.
If you’ve ever felt overwhelmed by the sheer number of choices or worried about breaking the bank, you’re not alone. The good news: there are excellent options tailored for every budget, and I’ll help you find the perfect fit. Ready to dive into the world of top-tier gear? Let’s go!
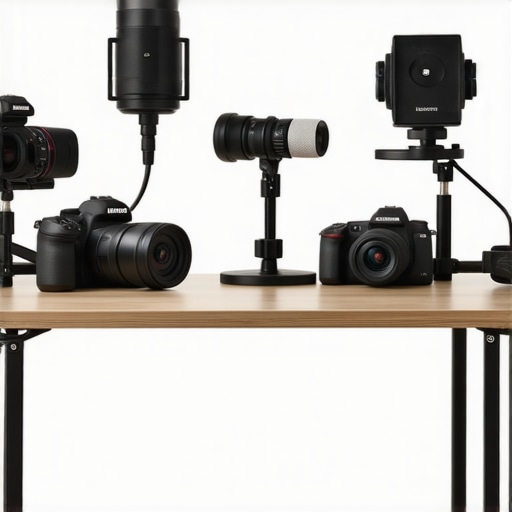
Choose the Right Camera Body
Start by selecting a camera that fits your content style and budget. For beginners, mirrorless models like the top mirrorless cameras for YouTube Shorts in 2025 offer excellent 4K quality and portability. If you’re aiming for professional-grade streams, consider higher-end options that support clean HDMI output and high bit rates.
Test Before You Commit
Apply this by renting or borrowing different models. I once borrowed a popular mirrorless from a friend and tested it during a live stream. The result was shaky footage because I hadn’t set up stabilization properly. This experience showed me the importance of testing gear in real conditions before making a purchase.
Optimize Camera Settings for Clarity
Get familiar with settings like aperture, shutter speed, ISO, and white balance. For example, setting your aperture wide (f/1.8 – f/2.8) can blur backgrounds and focus attention. I learned this when I initially used auto settings, which caused inconsistent exposure. Manually adjusting these settings gave my videos a more professional look.
Use Custom Profiles
Create custom picture profiles tailored for streaming. This helps maintain consistent color and contrast across sessions. I did this by tweaking my profile to boost shadows and reduce noise, which improved my video quality significantly. For detailed profiles, check the comprehensive guide to camera settings.
Set Up Your Lighting Effectively
Lighting makes or breaks video quality. Use soft, diffuse lights to eliminate harsh shadows. I initially recorded in my dim living room, resulting in grainy footage. After investing in a ring light and some softboxes, my video clarity improved instantly, making my face pop and details sharper.
Position Lighting Correctly
Place lights at 45-degree angles from your face for natural, flattering illumination. Avoid backlighting that causes silhouettes. During my first live session, I positioned a light behind me, which made my face dark and unprofessional. Re-positioning the lights improved my visibility and viewer engagement.
Stabilize Your Footage
Use a tripod or gimbal to keep your camera steady. I started filming handheld, which caused jittery footage. Transitioning to a lightweight gimbal made my streams smoother and more engaging. For static shots, a sturdy tripod is your best friend.
Implement Camera Stabilization Features
If your camera supports in-body stabilization (IBIS), enable it. This reduces shake during movement. I tested this feature during a walk-and-talk segment, and it eliminated unwanted jitters, resulting in professional-looking footage.
Master Focus Techniques
Use autofocus with face or eye tracking for dynamic content. I once manually focused during a live unboxing, which caused delays and blurry shots. Switching to autofocus with tracking kept my face sharp, freeing me to focus on delivering my content.
Use Focus Peaking and Zoom
For manual focus, activate focus peaking and use your camera’s zoom feature to fine-tune. I practiced this during my first detailed tutorial, which improved my focus accuracy dramatically. Consistent focus ensures your viewers stay engaged without distraction.
Many content creators believe that simply opting for the latest 4K camera guarantees professional results. However, this is a common misconception that can lead to costly mistakes. In my experience, what most people overlook are the nuanced factors that truly influence your camera’s performance and how it integrates into your setup. Let’s dig deeper into these often-ignored details and dispel some myths.
Why Bigger Megapixels Don’t Always Mean Better Quality
It’s tempting to think that a camera with higher megapixels will automatically produce sharper images. But in reality, megapixels are just one piece of the puzzle. The sensor size, pixel size, and image processing algorithms play a crucial role in overall image quality. For example, a 20MP full-frame sensor often outperforms a 30MP smaller sensor in low-light conditions because larger pixels gather more light, reducing noise. So, when choosing a camera for streaming, focus on sensor quality and size rather than megapixel count alone.
The Overlooked Impact of Lens Compatibility and Quality
Many creators fixate on the camera body but forget that the lens can make or break your image clarity. A high-quality lens with a wide aperture (like f/1.8 or f/2.8) ensures sharp focus and good background separation. Investing in a good lens is more beneficial than upgrading your camera body alone. Also, compatibility issues can cause frustration; always verify if your chosen lens suits your camera model and streaming needs.
Don’t Underestimate the Power of Proper Settings and Calibration
Even the best camera can underperform if not correctly calibrated. Auto settings might seem convenient, but they often produce inconsistent exposure and color balance during live streams. Manual adjustments and creating custom profiles tailored for your environment can significantly enhance image consistency. Additionally, regular calibration of your monitor and camera ensures color accuracy, making your stream look professional and cohesive. For detailed insights, check out this guide on mastering camera settings.
Beware of the Myth That All 4K Cameras Are Equal
Not all 4K cameras deliver the same quality. Some models compress footage heavily or have limited bit rates, resulting in lower image fidelity. Look for cameras that support higher bit rates, clean HDMI output, and good autofocus features. A camera with poor autofocus can cause focus hunting, which distracts viewers. For example, some models excel in static shots but falter during movement, so consider your content style when choosing. To see the best options, explore the top 4K cameras for streaming in 2025.
Have you ever fallen into this trap? Let me know in the comments. Remember, investing in your gear wisely and understanding these hidden nuances can elevate your content from average to outstanding. For a comprehensive overview, visit this ultimate guide.
Maintaining your camera setup and streaming tools is crucial for consistent, high-quality content. Over time, dust, firmware glitches, and hardware wear can impair your footage. That’s why I swear by a few specific practices and tools to keep everything running smoothly. Regularly updating your camera firmware, for instance, is vital. Manufacturers often release updates that fix bugs, improve stability, and add features. For example, I always check the latest firmware for my Sony Alpha series via their official privacy policy page to stay current.
Besides firmware, cleaning your gear is non-negotiable. Use a soft, anti-static brush and microfiber cloth to remove dust from lenses and sensors. I personally use a lens cleaning wipe that’s gentle but effective, preventing smudges that can ruin a shot. Remember, never spray cleaning solution directly onto your gear; apply it to the cloth instead. This careful approach helps maintain optimal image quality over years.
For software, I recommend using OBS Studio with custom profiles tailored for your setup. I set up scene collections for different lighting conditions and streaming styles, which saves me time and keeps my quality consistent. Additionally, using a dedicated capture card, like the Elgato Cam Link 4K, ensures clean HDMI output and reduces lag. I’ve found that investing in reliable tools like this pays off in the long run, especially when scaling your content creation efforts.
Anticipating future trends, I believe hardware interoperability and automation will become even more seamless. Think smart firmware that updates automatically or AI-powered calibration tools that optimize settings in real-time. Staying ahead means not just investing in quality gear but also leveraging the right tools for maintenance and automation. For more insights on gear management, check out this detailed guide.
How do I keep my camera gear working perfectly over time?
One of my favorite tips is setting a quarterly maintenance routine. This includes firmware checks, sensor cleaning, and calibration tests. I use a small, portable air blower to remove dust from sensors and lenses, and I always keep spare SD cards and batteries on hand. Regularly testing your setup before live sessions ensures everything is aligned and functioning, saving you from embarrassing glitches mid-stream. If you notice any performance drops, don’t hesitate to consult the manufacturer’s support or visit professional repair services — catching issues early is vital.
Remember, your gear is an investment. Proper upkeep not only extends its lifespan but also guarantees your audience sees you at your best. Try integrating advanced maintenance tips like automating firmware updates or scheduling routine checks — these small steps make a big difference. For more expert advice on managing your content creation tools, visit this resource.
After years of experimenting and learning the hard way, I’ve uncovered some insider lessons that can save you time and money when selecting your perfect 4K camera for streaming in 2025. Here are the most impactful revelations:
- Higher megapixels don’t always mean better quality. I used to chase after cameras with the highest MP ratings, thinking they’d automatically produce sharper images. The truth is, sensor size and pixel quality matter more—larger sensors with bigger pixels outperform smaller ones in low light and produce cleaner footage. Focus on sensor quality rather than megapixel count.
- The lens makes all the difference. A cheap lens can ruin otherwise excellent camera hardware. I learned to prioritize lenses with wide apertures (f/1.8 or f/2.8) and good optical quality. A great lens elevates your image clarity and background separation, making your streams look professional.
- Manual settings trump auto modes every time. Auto exposure and focus can cause inconsistency during live streams. I now create custom profiles and learn to tweak aperture, ISO, and white balance manually. This consistency keeps viewers engaged and gives your content a polished feel.
- Proper calibration and regular maintenance are game-changers. I schedule quarterly sensor cleanings, firmware updates, and calibration checks. This routine ensures optimal performance over years and prevents unexpected glitches that can ruin a live session.
My Essential Gear for Stream-Ready 4K Content
Over the years, I’ve curated a toolkit that keeps my streams sharp and reliable. My top recommendations include:
- Capture Card: The Elgato Cam Link 4K — I trust it for clean HDMI output and minimal latency, which are critical for live streaming.
- Lighting: Softboxes and ring lights — Proper lighting transformed my videos from dull to vibrant, enhancing clarity and color accuracy.
- Cleaning Supplies: Anti-static brushes and microfiber cloths — Regular cleaning prevents dust and smudges that can degrade image quality over time.
Seize the Moment and Elevate Your Content
Creating stunning 4K streams in 2025 isn’t just about buying the latest gear; it’s about understanding the nuances and maintaining your setup diligently. Every upgrade, tweak, and routine check brings you closer to professional-quality content that truly stands out. The future of streaming is bright for those willing to learn and adapt — your viewers will thank you for it!
What has been your biggest challenge in choosing or setting up a 4K streaming camera? Share your experiences below—I’d love to hear your story!
This post really resonated with me, especially the part about testing gear in real conditions before making a purchase. I once bought a camera that looked great on specs but didn’t perform well in my typical lighting setup, leading to frustration. Since then, I always try to rent or borrow models first to see how they handle my environment. The importance of calibration and proper settings can’t be overstated—sometimes auto modes just don’t cut it for professional-looking streams. I’ve also found that investing in good lenses makes a huge difference, especially with wide apertures that help keep the focus sharp on my face while blurring out distractions in the background.
What’s been your experience with camera stabilization? I used to film hand-held, resulting in jittery videos, but switching to a gimbal made my streams look so much more polished. Do others prefer in-body stabilization or external tools? It’d be great to hear tips on balancing mobility with stability during live sessions!
This post really hits home for me, especially the point about not just chasing after the highest megapixels without considering sensor size and quality. I’ve made that mistake before—thinking more megapixels automatically meant better quality, only to realize that a large full-frame sensor with fewer megapixels often produces stunning low-light footage compared to smaller sensors with higher MP counts. It’s fascinating how a lot of creators overlook the importance of lens compatibility, too. I once upgraded my camera body but stuck with an old lens that doesn’t support wide apertures, which limited my ability to create that professional bokeh effect. Since then, I’ve invested in good glass, and it’s made a huge difference.
I’m curious, how do others manage the balance between effective lighting and maintaining a minimal setup for mobile streaming? I’ve been considering portable softboxes and ring lights, but I wonder if there are compact solutions that deliver similar results without cluttering my space. Exploring these options could really help streamers like me get the best image quality without sacrificing portability. Would love to hear other experiences or tips on achieving excellent lighting on the go!
This article really hits the core of what I’ve learned in my own streaming journey. Upgrading to a quality 4K camera definitely made my videos sharper and more engaging, especially when I started utilizing manual settings like focus and white balance. I’ve found that investing time in understanding these nuances makes a noticeable difference in professional appearance. The tip about testing gear before committing is so true—I once bought a camera based on specs alone, but it didn’t handle my low-light conditions well, which was frustrating.
Also, I’ve been experimenting with different lighting setups, and I totally agree that positioning lights at 45 degrees creates a soft, natural look. Have others here found any portable lighting solutions that balance quality and convenience? I’m curious about compact brands that are suitable for quick setups during on-the-go streams. The effort to maintain and calibrate gear regularly really pays off, as I’ve noticed consistency in my live output when I keep up with routine maintenance. How do you all keep your gear in tip-top shape without it turning into a chore? Would love to hear your tips and experiences.